If you searched for "wordpress plugin vulnerability response plan", you probably do not need a generic WordPress article. You need a practical order of operations that protects the site, the business process, and the evidence you may need later.
This guide is written for site owners and marketing teams who need to patch without breaking lead flow. It focuses on what to check first, what to avoid, and how to prove the issue is fixed before you move on.
Quick answer
| Check | What it tells you |
|---|
| First question | Is the vulnerable plugin active on the site, not just present in a backup or staging copy? |
| Biggest mistake | Updating blindly before taking a backup and checking whether the site was already touched. |
| Proof to keep | Plugin version before and after, backup timestamp, admin user list, access log window, and the retest notes. |
Start with exposure, not fear
A WordPress plugin vulnerability response plan should start by proving whether the site is exposed. The plugin name alone is not enough. You need the installed version, plugin status, feature usage, public endpoint exposure, and the date range when exploitation became realistic.
This matters because many advisories sound equally urgent, but the work order is different for each site. A disabled plugin, a patched plugin, a plugin used only on a private staging site, and a public form plugin with active traffic do not deserve the same response.
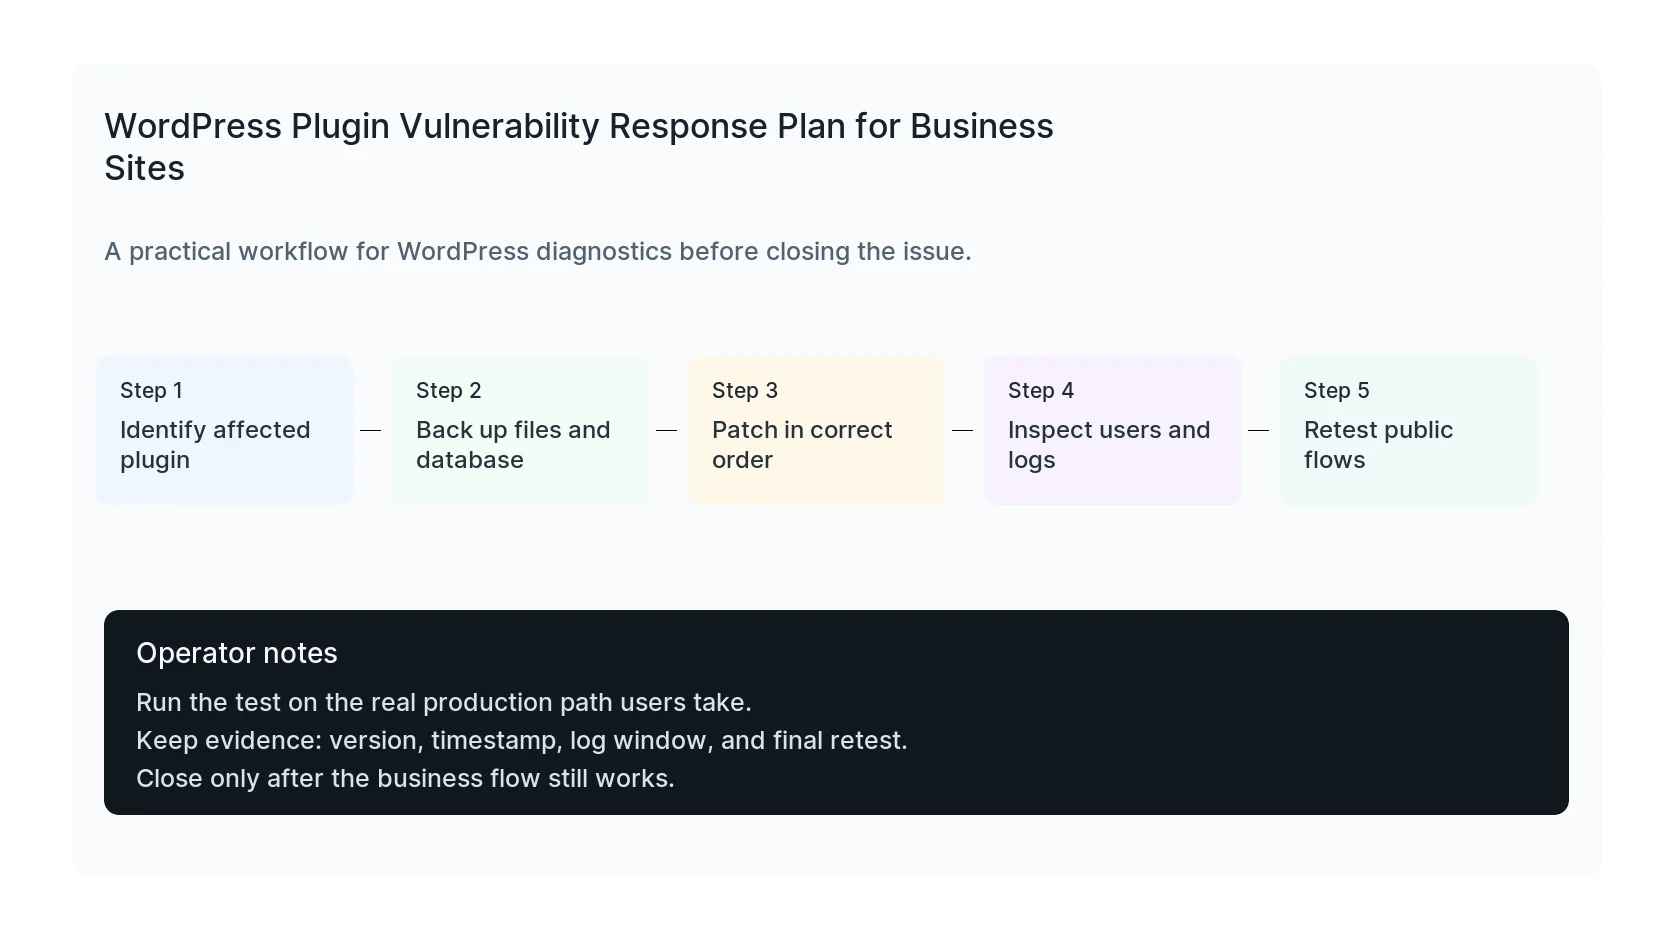
Take a backup before the fix changes evidence
Before updating or deleting anything, take a database and file backup. A clean backup protects the business if the patch breaks checkout, forms, membership access, or custom code. It also preserves evidence if the site was already compromised.
If the site is actively redirecting visitors, creating admin users, or serving suspicious files, isolate first. That can mean maintenance mode, firewall blocks, a temporary WAF rule, or removing public access to the vulnerable endpoint while you preserve enough evidence to understand what happened.
Patch the vulnerable path and then check for damage
A plugin update is the first repair, not the final proof. After patching, check administrator accounts, recently modified files, scheduled tasks, mu-plugins, uploads, wp-config.php, and database options that can load scripts or redirect traffic.
For ecommerce and lead generation sites, also retest the business path. Make sure forms still submit, emails still send, checkout still completes, conversion tags still fire, and CRM records still capture source data.
Document the result so the next alert is easier
Keep a short response note for every meaningful vulnerability. Record the advisory, plugin version, patch action, backup location, users reviewed, suspicious files found, and final test result. This becomes the memory your future team needs.
The goal is not to make every update dramatic. The goal is to make vulnerability handling repeatable enough that urgent security news does not turn into random production changes.
Checklist to run before you close the issue
- Confirm the plugin slug and installed version.
- Check whether the vulnerable feature is enabled.
- Snapshot files and database before changes.
- Patch, disable, or remove the plugin.
- Review admin users and recent file changes.
- Retest forms, checkout, emails, and tracking.
Useful command or test
Use this as a starting point, then adapt it to the hosting stack, plugin names, and access level you actually have.
wp plugin list --update=available && wp user list --role=administrator --fields=ID,user_login,user_email,user_registered
When to get help
If this affects production traffic, paid ads, checkout, membership access, healthcare privacy, lead routing, or search visibility, do not leave the fix half-tested. HandL WP can trace the issue across WordPress, server logs, plugins, forms, tracking, and Search Console. If you want a senior engineer to check it, book a WordPress security response.
Sources and further reading